the foundation for tolerances is laid. Engineers and designers use computer-aided design (CAD) software to create detailed 3D models of the parts. They specify the nominal dimensions, which are the ideal or target values for each feature of the part. Alongside these nominal dimensions, they also define the allowable variation or tolerance. For example, if a shaft is designed to have a diameter of 20 mm, the tolerance might be specified as ±0.1 mm. This means that the actual diameter of the shaft can be anywhere between 19.9 mm and 20.1 mm and still be considered within acceptable limits.
Machining is a precise and complex process that demands careful control and understanding of tolerances. Tolerances play a crucial role in ensuring that the final machined parts meet the required specifications and function properly. In this article, we will explore how tolerances are created in machining.
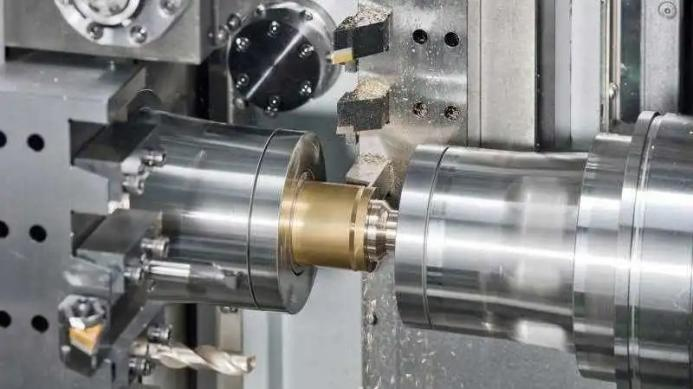
The choice of machining process also has a significant impact on tolerances. Different machining operations such as milling, turning, drilling, and grinding have their own inherent capabilities and limitations in terms of achieving tight tolerances. For instance, turning is often used for cylindrical parts and can achieve relatively good concentricity and diameter tolerances. Milling, on the other hand, is suitable for creating complex shapes and can control dimensions within a certain range. Grinding is a finishing process that can produce extremely fine surface finishes and tight tolerances, especially for flat and cylindrical surfaces. The skill and experience of the machinist operating these machines are also vital. A highly skilled machinist can make adjustments and use their knowledge to optimize the machining process to meet the required tolerances. They know how to select the right cutting tools, cutting speeds, feed rates, and depths of cut. For example, using a sharp cutting tool and the appropriate cutting speed can help to reduce tool wear and ensure more consistent machining, which in turn contributes to better tolerance control.
The quality of the machine tools themselves is another crucial factor. Modern CNC machine tools are equipped with advanced features and high precision components. They have accurate positioning systems, such as linear guides and ball screws, which can precisely move the cutting tool or workpiece. The rigidity of the machine structure also affects tolerance. A more rigid machine can better withstand the forces generated during machining and prevent unwanted deflections that could lead to out-of-tolerance parts. Additionally, machine tools are calibrated regularly to maintain their accuracy. Calibration involves checking and adjusting the machine’s axes, spindles, and other components to ensure that they are operating within the specified tolerances. This is usually done using precision measuring instruments like laser interferometers and ball bars.
The selection of cutting tools and tooling systems is equally important. High-quality cutting tools with the right geometry and coating can improve machining performance and tolerance control. For example, a carbide cutting tool with a specific rake angle and coating can provide better chip evacuation and reduce cutting forces, resulting in more accurate machining. Tool holders and workholding devices also need to be carefully chosen. A stable and accurate tool holder ensures that the cutting tool is properly positioned and held during machining. Similarly, a reliable workholding system, such as a chuck or a vise, securely holds the workpiece in place to prevent movement or vibration that could affect the final dimensions.
During the machining process, in-process measurement and feedback control are essential for maintaining tolerances. Some advanced CNC machines are equipped with sensors that can measure the dimensions of the part while it is being machined. This real-time data is then used to make automatic adjustments to the machining parameters. For example, if the sensor detects that a dimension is approaching the upper or lower tolerance limit, the machine can adjust the feed rate or cutting depth to correct the deviation. This closed-loop control system helps to ensure that the final part is within the specified tolerances.
Post-machining inspection is the final step in ensuring that the tolerances have been met. Various measuring instruments are used, such as micrometers, calipers, coordinate measuring machines (CMMs), and optical comparators. These instruments measure the actual dimensions of the machined part and compare them with the nominal dimensions and tolerances specified in the design. If any out-of-tolerance conditions are detected, the part may need to be reworked or scrapped. However, with proper process control and attention to detail during machining, the number of rejected parts can be minimized.
Rapidefficient is a prominent player in the CNC aluminum machining market. They have a team of highly skilled machinists who are well-versed in all aspects of tolerance control. Their state-of-the-art CNC machine tools are regularly calibrated and maintained to ensure the highest level of accuracy. Rapidefficient also uses advanced cutting tools and tooling systems, carefully selected to optimize machining performance and meet the tightest tolerances. With their commitment to quality and precision, they have built a reputation for delivering high-quality machined parts that consistently meet or exceed customer expectations. If you are in need of CNC aluminum machining services with strict tolerance requirements, Rapidefficient is an excellent choice.

