Introduction
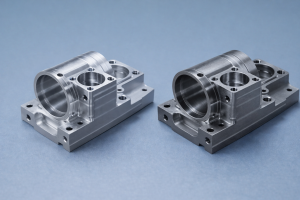
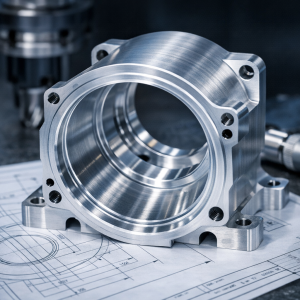
In the realm of CNC machining, precision parts processing fixtures play a pivotal role. They are the unsung heroes that ensure the accuracy, efficiency, and quality of the manufacturing process. These fixtures are designed to hold and position the workpiece securely during machining operations, enabling the cutting tools to achieve the desired precision and surface finish. Without proper fixtures, it would be nearly impossible to produce complex and intricate parts with the tight tolerances required in industries such as aerospace, automotive, and medical.
As we delve deeper into the world of precision parts processing fixtures, we will explore the regulations that govern their design, selection, and use. Additionally, we will uncover the significant value that rapidefficient brings to the table in the highly competitive CNC machining market.
Understanding Precision Parts Processing Fixtures
Definition and Basics
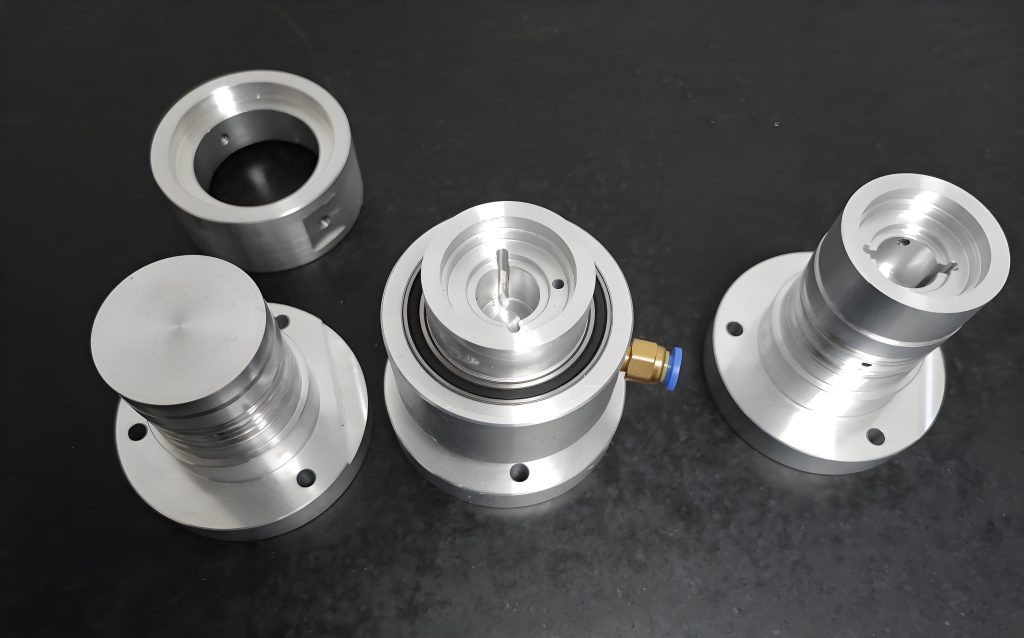
A precision parts processing fixture is a specialized tool used in CNC machining to firmly hold and accurately position the workpiece during the machining process. Its primary function is to ensure that the part remains stationary and in the correct orientation while the cutting tools perform operations such as milling, turning, drilling, and grinding. By providing a stable platform, fixtures enable the machining process to achieve the required precision, often within tight tolerances of a few microns.
This level of precision is crucial for producing high – quality parts that meet the strict standards of various industries. For example, in aerospace, components like turbine blades need to be manufactured with extreme precision to ensure the efficient operation of aircraft engines. The fixture plays a vital role in achieving this precision by minimizing any potential movement or misalignment of the workpiece.
Types of Fixtures
- Universal Fixtures: These are versatile fixtures that can be used for a wide range of workpiece shapes and sizes. Examples include vise jaws, magnetic chucks, and three – jaw chucks. Vise jaws are commonly used in milling operations and can grip workpieces of different shapes with the help of adjustable jaws. Magnetic chucks are useful for holding ferrous materials and are often employed in grinding processes. They provide a quick and easy way to secure the workpiece, and their holding force can be adjusted as needed. Three – jaw chucks, typically used in lathe operations, are capable of centering round workpieces automatically, making them suitable for a variety of turning tasks.
- Special – Purpose Fixtures: As the name implies, these fixtures are designed for specific parts or machining operations. They are custom – built to meet the unique requirements of a particular workpiece, taking into account its shape, size, and the machining processes it will undergo. For instance, a fixture for machining a complex – shaped automotive engine block will be tailored to hold the block in the exact position required for drilling, milling, and boring operations. Special – purpose fixtures offer high precision and repeatability, as they are engineered to fit the part like a glove. However, they can be costly to design and manufacture, but the investment is often justified when producing large volumes of a specific part.
- Modular Fixtures: Modular fixtures are made up of a set of standardized components that can be assembled and disassembled to create custom fixtures for different workpieces. These components include base plates, clamping elements, and locating pins. The advantage of modular fixtures is their flexibility. They can be quickly reconfigured to accommodate different part designs, reducing the need for costly custom – built fixtures for every new part. This makes them an attractive option for small – to medium – batch production runs, where the ability to adapt to changing part requirements is essential.
Key Regulations in Precision Parts Processing Fixture
Design Standards
The design of precision parts processing fixtures is subject to several crucial standards. First and foremost, precision is non – negotiable. The fixture must be designed to hold the workpiece with an accuracy that aligns with the tight tolerances of the part being machined. This means that the positioning elements of the fixture should be designed to within microns of accuracy. For example, if a part has a tolerance of ±0.05mm in a particular dimension, the fixture’s design should ensure that the workpiece is held within a much smaller tolerance band to account for any potential variations during machining.
Stability is another key aspect of fixture design. The fixture needs to be rigid enough to withstand the cutting forces exerted during machining operations. This is especially important in high – speed machining processes where the forces can be substantial. A stable fixture design prevents any unwanted vibrations or deflections, which could otherwise lead to inaccuracies in the machined part. To achieve this, the fixture’s structure should be well – thought – out, with appropriate bracing and support mechanisms. For instance, using thick – walled materials and strategically placed ribs can enhance the fixture’s stability.
Ergonomics also plays a role in fixture design. The fixture should be easy for operators to load and unload the workpiece. This not only improves efficiency but also reduces the risk of operator – induced errors. Design features such as clear access points, intuitive clamping mechanisms, and proper handling grips can contribute to better ergonomics.
Material Selection Rules
When it comes to selecting materials for precision parts processing fixtures, several factors need to be considered. Strength is a fundamental requirement. The material must be strong enough to withstand the mechanical stresses imposed during machining, including the cutting forces, clamping forces, and any vibrations. High – strength alloys, such as certain grades of steel, are often preferred for their ability to endure these forces without deforming. For example, alloy steels with high carbon content can offer excellent strength and hardness, making them suitable for fixtures used in heavy – duty machining operations.
Wear resistance is another crucial factor. Since fixtures are repeatedly used in machining processes, the material should be able to resist wear over time. Materials like hardened steel or carbide – coated materials are ideal for areas of the fixture that come into contact with the workpiece or the cutting tools. Carbide – coated surfaces can significantly extend the lifespan of the fixture by reducing the rate of wear, thus maintaining the fixture’s accuracy over a longer period.
Thermal stability is also essential, especially in processes where there is a significant heat generation. The material should not expand or contract significantly due to temperature changes during machining. This is particularly important in precision machining, as thermal-induced dimensional changes can lead to inaccuracies in the machined part. Materials with low coefficients of thermal expansion, such as certain ceramic materials or specialized alloys, are often chosen to ensure thermal stability.
Manufacturing and Quality Control
The manufacturing process of precision parts processing fixtures demands strict quality control. One of the primary aspects is dimensional accuracy. Every component of the fixture must be manufactured to the exact dimensions specified in the design. This requires the use of high – precision machining equipment and skilled operators. For example, computer – numerical – controlled (CNC) machining is commonly employed to achieve the tight tolerances required. During the machining process, regular measurements are taken using precision measuring instruments such as coordinate measuring machines (CMMs) to ensure that the dimensions are within the allowable tolerances.
Surface finish is another critical quality control point. The surfaces of the fixture that come into contact with the workpiece need to be smooth to prevent any damage to the workpiece and to ensure proper positioning. Grinding and polishing operations are often carried out to achieve the required surface finish. Additionally, the quality of the joints and connections within the fixture is crucial. Any loose or misaligned joints can compromise the fixture’s performance and accuracy. Therefore, strict quality control measures are applied during the assembly process to ensure that all components are properly joined and aligned.
Quality control also extends to the inspection of the finished fixture. A comprehensive inspection process is carried out to check for any defects, such as cracks, porosity, or dimensional inaccuracies. Non – destructive testing methods, like ultrasonic testing or magnetic particle inspection, may be used to detect internal defects. Once the fixture passes the inspection, it is ready to be used in the precision parts machining process, where it will play a vital role in ensuring the quality and accuracy of the manufactured parts.
The Value of Rapidefficient in CNC Machining Market
Efficiency Enhancement
Rapidefficient has revolutionized the CNC machining process by significantly enhancing efficiency. One of the key ways it achieves this is through its advanced tool – changing mechanisms. In traditional CNC machining setups, tool – changing operations can be time – consuming, especially when dealing with complex parts that require multiple types of cutting tools. However, rapidefficient’s innovative tool – changing system is designed to operate at high speeds with minimal downtime. For example, it can change tools in a matter of seconds, compared to the minutes it might take in some older systems. This rapid tool – changing ability allows for a seamless transition between different machining operations, such as quickly moving from milling to drilling, without wasting valuable production time.
Moreover, rapidefficient’s high – speed spindle technology is a game – changer. The spindles are capable of reaching extremely high rotational speeds, enabling faster cutting rates. This means that the machining process can cover more surface area in a shorter time. For instance, when machining aluminum parts, the high – speed spindles can remove material at a much faster pace, reducing the overall machining time for each part. Additionally, the efficient coolant delivery system in rapidefficient machines plays a crucial role. It ensures that the cutting tools are continuously cooled during operation, preventing overheating and allowing for sustained high – speed machining. This not only speeds up the process but also extends the lifespan of the cutting tools.
Precision Assurance
Precision is the cornerstone of high – quality CNC machining, and rapidefficient excels in this aspect. The company’s machines are equipped with state – of – the – art motion control systems. These systems use advanced algorithms and high – precision sensors to precisely control the movement of the axes. For example, the linear motors in rapidefficient machines can achieve sub – micron positioning accuracy. This level of accuracy is crucial for machining parts with tight tolerances, such as those used in the aerospace and medical industries. In aerospace, components like engine components need to be machined with extreme precision to ensure optimal performance and safety. Rapidefficient’s motion control systems can hold the workpiece in the exact position required for machining, minimizing any potential errors.
The rigidity of rapidefficient’s machine structures also contributes to precision. The machines are built with heavy – duty, high – strength materials and a robust design. This rigidity helps to withstand the cutting forces generated during machining without any significant deflection. As a result, the cutting tools can maintain their intended path, ensuring that the machined part meets the required dimensional and geometric tolerances. For example, when milling complex shapes with multiple contours, the rigid structure of the machine ensures that the tool follows the programmed path accurately, resulting in a precise and smooth surface finish. Additionally, rapidefficient’s quality control measures, including in – process monitoring and inspection systems, further guarantee precision. These systems can detect any deviations from the desired specifications in real – time and make adjustments to ensure that the final product is of the highest quality.
Cost – effectiveness
Rapidefficient offers remarkable cost – effectiveness in the CNC machining market. Firstly, its high efficiency directly reduces production costs. By shortening the machining time for each part, more parts can be produced within a given time frame. This increased productivity means that the fixed costs of the manufacturing process, such as machine depreciation, labor, and factory overheads, are spread over a larger number of units. For example, if a traditional CNC machining setup can produce 100 parts in a day, and rapidefficient’s system can produce 150 parts in the same time, the cost per part for factors like machine usage and labor is significantly reduced.
Secondly, rapidefficient’s focus on precision leads to a lower rejection rate. Since the parts are machined with high accuracy, fewer parts are likely to be rejected due to dimensional inaccuracies or other quality issues. This reduces the cost associated with reworking or scrapping defective parts. In industries where materials are expensive, such as aerospace and electronics, the savings from reducing the Reject rate can be substantial. For instance, if a single aerospace component costs thousands of dollars in materials, and rapidefficient can reduce the Reject rate by even a small percentage, the cost savings over a large production run can be significant. Additionally, the longer lifespan of the cutting tools in rapidefficient machines, due to its efficient cooling and stable machining process, also reduces tool replacement costs. This combination of increased efficiency, reduced Reject rate,and lower tool costs makes rapidefficient an attractive option for manufacturers looking to optimize their production costs while maintaining high – quality standards.
Conclusion
In conclusion, precision parts processing fixture regulations are the cornerstone of high – quality CNC machining. From the design standards that demand precision, stability, and ergonomics, to the material selection rules based on strength, wear resistance, and thermal stability, and the strict manufacturing and quality control processes, every aspect plays a crucial role in ensuring the accuracy and quality of the machined parts.
Rapidefficient, with its efficiency enhancement, precision assurance, and cost – effectiveness, has emerged as a game – changer in the CNC machining market. It offers manufacturers the ability to produce high – quality parts at a faster pace, with less waste, and at a lower cost.
As the demand for precision parts in industries such as aerospace, automotive, and medical continues to grow, it is essential for manufacturers to pay close attention to fixture regulations and consider the benefits that rapidefficient can bring. By doing so, they can stay competitive in the global market and meet the ever – increasing demands of their customers. Whether you are a small – scale manufacturer or a large – scale enterprise, exploring the services of recommended rapidefficient CNC aluminum processing service providers like Prady, Wanfuxin, and Smile RP Limited could be a step towards achieving greater efficiency and precision in your manufacturing process.

